
You can make Spiral Ducts with a Machine by following one repeatable sequence. The process starts when the decoiler releases the coil and the feeding system pushes the strip into the rollers. Forming comes next, where the strip curls into a helix. Lock seam closing then locks the edges into an airtight joint, and a cutting cycle trims the tube to length. A final quality check confirms the result.
Lockforming Machinery equipment supports this workflow from coil loading onward, so you control each stage with confidence. This guide gives you a complete, actionable procedure for building a reliable spiral air duct. You will learn sheet metal preparation, setup, forming, cutting, hvac duct quality control, and safety.
Coil stock choice sets the limits for every later stage. Match the strip width to the target duct diameter and the gauge to the pressure class the job demands. Galvanized strip steel is a common choice for automated spiral duct production because it feeds smoothly and holds a tight seam. Galvannealed coil slit to 5.394 inches in 26–20 gauge, as listed by NB Handy, suits spiral duct manufacturing well.
Other metals follow similar rules. Rolled Metal Products lists stainless steel 304 2B at 5.394 inches wide in 18 through 26 gauge, and aluminum 5052 H32 and 3003 H14 at 5.50 inches wide in 14 through 24 gauge. Confirm the coil width against your machine model before you load it. Lockforming Machinery can advise on matching coil specifications to your equipment.
A clean floor protects both the operator and the finished spiral air duct. Keep a clear feed path from the coil stand to the machine entry and a clear exit path for finished ducts. Set the machine on stable footing so vibration stays low during forming. BYFOMachine notes that a clean, organized workspace and routine inspections prevent breakdowns and reduce downtime.
Apply the same discipline to tools and lighting. Ventech Machine recommends designated storage areas with labeled drawers, tools arranged in the order of the cutting steps, and well-lit work areas free of clutter. These habits shorten setup time and cut the risk of trips and falls. Treat sheet sizing and preparation as a formal checklist step, not an afterthought.
A pre-run inspection protects the machine and the finished product. Walk the line before you load any coil. Check the forming rollers, the lock seam closing tools, the cutoff blade, and the drive components. Confirm that each part sits firmly in place and shows no visible wear.
The maintenance guidance from BLKMA covers the same ground. Lubricate rollers and bearings with the grade named in your manual and follow the stated intervals. Listen to the motor, reducer, and belts for abnormal noise, vibration, or overheating, and stop at once if you hear any. Inspect cables, switches, and relays, and keep the electrical cabinet dry and dust-free. Replace worn molds and cutters promptly, and test the emergency stop and guards. A round spiral duct making machine rewards this routine with steady output.
The core function of a spiral duct machine is turning a set width of coil into a spiral tube. Width and diameter settings must therefore match before you feed material. A mismatch produces a loose seam or an out-of-round duct.
Set the machine in a fixed order:
Lockforming.com notes that a Flex spiral forming machine follows this sequence with adjustable heads for different diameters. Run the machine idle after adjustment. Listen for abnormal sounds and watch the bite quality, as BYFOMachine advises. A fully automatic spiral duct machine still needs this manual confirmation. Check the settings twice before the first strip enters the rollers.
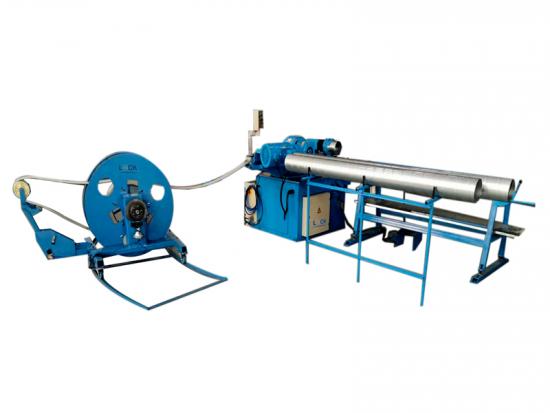
You now hold a set width of coil and a confirmed machine setup. The next task is a smooth handoff from storage to the forming head. Auto-Altron describes coil feeding as the stage that transports stock to the next operation, and it separates drive types by load. Thick or heavy material needs a motor-driven feed, or the machine cannot pull the strip. Clamping follows the same logic: hydraulic clamping suits material thicker than 1.5 mm, and pneumatic clamping handles thinner stock.
Follow this sequence at the start of each run:
A servo-controlled straightener flattens the strip before it reaches the forming head. That flatness matters. A bent leading edge wanders inside the spiral duct forming machine and throws off the first wrap. Misalignment at the entry creates uneven spiral pitch, so verify the entry angle before you commit the strip.
Forming rewards attention more than speed. Watch three things once the seam runs: seam alignment, strip tension, and feed rate. Altron lists the checks that belong in this routine, including dimensional deviations, surface defects, seam quality, roller position and pressure, roller spacing, conveyor speed, feed length, and forming speed read from an encoder. Treat that list as your watch station.
Strip tension deserves special care. A hydraulic decoiler holds back tension steady, which keeps the strip stable at high speed. Photoelectric sensors track coil alignment and adjust roller tension when deviation passes the set tolerance. Feed speed usually sits between 10 and 35 m/min, depending on duct size and material. Stay at the low end for heavy gauge and widen the range only after the seam proves stable.
Keep your hands clear and your eyes on the seam. A steady rate beats a fast one during the early wraps of any spiral air duct. Small corrections now prevent scrap later in the production process.
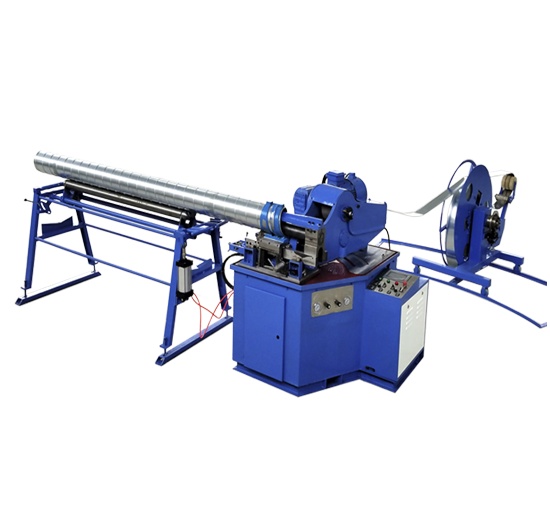
The closing stage turns an open spiral into a finished tube. Your spiral duct forming machine presses the interlocked edges together under roller pressure as the strip leaves the forming head. Duct2Go describes the result clearly:
Spiral duct is round pipe formed from a continuous strip of metal wound into a helix, with a four-ply lockseam that spirals along the full length. The seam is mechanically closed at the machine, so the pipe arrives on site as a finished, rigid tube — typically in 10-foot lengths, in a diameter range that varies by fabricator.
Confirm the seam before you allow a cut. Run your eye along the full helix and check for gaps, lifted edges, or skipped sections. A properly closed seam feels tight under light finger pressure and shows an even profile. Duct2Go notes that testing has shown spiral seam leakage itself is negligible, and the only field-sealed points are the couplings between sections and fittings. That reliability depends on a complete closure at the machine, so stop and correct any open section rather than cutting it loose.
A clean cut protects the joint you just closed. Engage the cut-to-length machine only after the seam passes inspection. Watch the blade enter square to the tube axis and confirm the finished end sits perpendicular to the length. A crooked cut throws off every downstream connection on the spiral air duct.
Prepare each end after the cut. Remove burrs from the inner and outer edges with a deburring tool or a light file pass. Sharp edges catch gloves and damage gaskets during installation. Check the cut end for crushed roundness and restore it gently if the blade distorted the profile. Sheet metal cutting at this stage is a finishing task, not a rough trim, so treat every end as a mating surface.
Rectangular work follows a different path. A pittsburgh lock-forming machine creates the Pittsburgh lock on straight sheet metal edges, and that lock-forming machine handles creating longitudinal lock profiles for rectangular duct fabrication. The Pittsburgh locks you form there differ from the helical seam on round work. Operators who run both lines keep the Pittsburgh lock settings separate from the spiral setup. Pittsburgh locks suit rectangular runs, and the helical seam suits round runs. Each process has its own tooling, and mixing the two settings costs time on both machines.
Routine duct fabrication quality control starts at the seam. Run your eye along the full helix and look for gaps, lifted edges, or skipped sections. A closed seam feels tight under light finger pressure and shows an even profile along its length. Any open section needs correction before the tube leaves the machine.
Measure next. Check the diameter at several points along the tube and confirm the length matches the cut list. Roll the duct across a flat surface to test roundness. An out-of-round section will fight every joint on site, so catch it here. Record each measurement against the shop drawing so the next run starts from known settings.
A finished spiral air duct is ready when it matches the approved drawings and arrives undamaged. HMF states that spiral ductwork is lighter per linear foot than rectangular ductwork of similar capacity, which reduces handling effort and speeds installation. The same source notes that regional distributors often keep fittings and sections in stock, shortening procurement timelines.
Confirm readiness with a short checklist:
Durmahvac advises marking support locations before drilling and checking alignment with a spirit level after fixing. Duct runs that sag or twist between supports create condensate points and raise leakage risk at joints. Standard jointing methods connect the sections, so a square, burr-free end is the last thing to verify.
Dress for the work before you touch the controls. Ductpipemachine.com lists sturdy anti-slip gloves as a baseline, with thick flame-resistant gloves mandatory for hot work. Eye protection belongs on every run, and that source recommends well-ventilated safety goggles or face shields. Wear dedicated work clothing in thick flame-resistant material that fits closely and allows free movement. Loose clothing and jewelry stay off the floor, and flammable garments never enter the shop. Safety shoes, hearing protection, and certified safety helmets complete the kit.
Guards protect you during every cycle. Never operate these machines without all safety guards installed, and never remove a protective device. Adjust the safety guards to match the diameter of the spiral air duct whenever you work at the cutting unit. Lock out the machine before any inspection or adjustment. This step removes stored energy and stops an accidental start while your hands sit near the rollers. Confirm the lockout with a quick start attempt, then proceed.
Coil stock carries real weight, so plan the lift before you commit. Use a lifting aid suited to the coil mass and keep your back straight. Clear the walkways between the decoiler, the machine, and the finished goods area. A clear path matters more on busy days, when several metal coils wait in line.
Finished ducts demand the same care. Carry sections with two people or a cart, and watch the cut ends. Deburred edges protect your gloves and your skin. Stack completed duct runs on stable racks so they cannot roll. Good housekeeping keeps the shop floor safe for everyone who shares the hvac fabrication space.
You now have the full sequence for making spiral ducts with a machine. Prepare the metal coil and the work area first. Set up the spiral duct machine and confirm every adjustment. Feed the strip, watch the forming, close the seam, and cut clean ends. Check quality, then follow the safety rules on every run. This order delivers consistent results.
Apply the guide on your own Lockforming Machinery setup. Practice one stage before you move to the next. Run the spiral duct machine idle until the settings feel familiar. Repeat the forming step until the seam stays true.
Mastery builds confidence. Each finished spiral air duct proves your process works. Steady practice raises hvac fabrication quality over time.
Match the coil width to the target diameter before you load the machine. A mismatch produces a loose seam or an out-of-round tube. Suppliers list common widths such as 5.394 inches for galvanized and stainless stock. Confirm the figure against your machine model first.
Run your eye along the full helix and look for gaps, lifted edges, or skipped sections. A closed seam feels tight under light finger pressure and shows an even profile. Correct any open section before the cut-to-length machine trims the tube to length.
A pittsburgh lock belongs to rectangular work, not round work. The pittsburgh locks you form on straight edges use separate tooling from the helical seam. Keep those settings apart from the spiral setup. Each process then runs without cross-contamination.
Feed speed usually sits between 10 and 35 m/min, depending on duct size and material. Stay at the low end for heavy gauge. Raise the rate only after the seam proves stable. A steady pace beats a fast one during the early wraps.
Check the tag number against the approved drawings. Verify gaskets, hanger spacing, and square, burr-free ends. Spiral ducts are lighter per linear foot than rectangular ducts of similar capacity, so handling is easier. A round profile still needs ceiling clearance, so confirm that too.
online service





 IPv6 network supported